Windows Media Player is a relic now and not that useful either. Here are steps to fully uninstall Windows Media Player in Windows 10.
Back in Windows 7, the Windows Media Player is one of the most popular software. Windows Media Player can play most file types and even have some of the best file organization options. In fact, if needed, the Windows Media Player can even retrieve metadata for all your media files and organize them according to your settings. As good as it is, there are far better apps out there that do the job not only better but faster.
In fact, that is one of the reasons why Windows Media Player is not the default media player in Windows. Though the Windows Media Player application is largely ignored, it is still installed and enabled in Windows 10. If you don’t want it, there are several different ways to uninstall Windows Media Player in Windows 10.
So, without waiting any further, let me show the steps to uninstall or disable Windows Media Player in Windows 10.
Jump to:
1] via Settings App
Windows Media Player is installed as an optional feature. So, all we have to do is uninstall it from the OpLtional Features page in the Settings app.
1. First, open the Settings app by searching for it in the start menu or by clicking on the “All Settings” button in the Action Center. For the same, you can also press the Win + I keyboard shortcut.
2. After opening the Settings app, go to the “Apps → Apps & Features” page. On the right panel, click on the “Optional Features” link under the Apps & Features section.

3. This action will take you to the optional features page. It can take a couple of seconds to load the installed optional features list. Once you see the list, scroll all the way down, click on the “Windows Media Player” option and then click on the “Uninstall” button.

As soon as you click on the button, Windows Media Player will be uninstalled silently in the background. To make the changes take effect, reboot Windows.
Reinstall
If you want to reinstall Windows Media Player again, go to the same Optional Feature page, click on the “Add a feature” button. Now, find Windows Media Player in the list, click on it, and then click on the “Install” button.
2] PowerShell Command to Uninstall Windows Media Player
As an alternative, you can also use a simple PowerShell command to uninstall the Windows Media Player. The best thing about this method is that you don’t have to go through obscure pages.
1. First, open the elevated PowerShell window. To do that, search for “PowerShell” in the start menu, right-click on it and select “Run as Administrator” option.
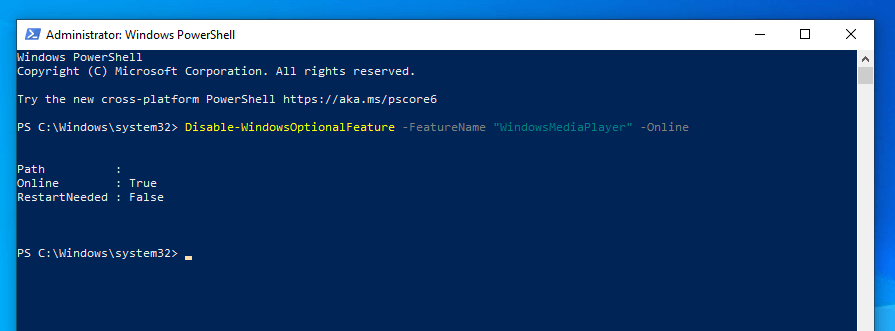
2. In the PowerShell window, execute the below command.
Disable-WindowsOptionalFeature –FeatureName "WindowsMediaPlayer" -Online
As soon as you execute the command, the PowerShell will uninstall the Windows Media Player. There is no need to restart Windows to make the changes take effect.
If you want to reinstall Windows Media Player via PowerShell, use the below command.
Enable-WindowsOptionalFeature –FeatureName "WindowsMediaPlayer" -All -Online
That is all. It is that simple to disable or remove Windows Media Player in Windows 10. I hope that helps. If you are stuck or need some help, comment below and I will try to help as much as possible.
If you like this article, do check out how to uninstall Internet Explorer in Windows 10.
It doesn’t work at all. I get this notice: impossible to execute command. What next?
I just tried it on my machine with Windows 10 v20H2 and it works. If you are unable to use the PowerShell command, try uninstalling Windows media player from the Setting app as shown in the first section.