If you use PowerShell scripts for Windows automation or administration, such as checking for Windows updates, network management, data manipulation, etc., having it run when the computer starts is incredibly useful. In this article, we’ll show you two simple ways to run a PowerShell script on Windows startup. Let’s get started.
Note: Before proceeding, make sure you change the PowerShell’s execution policy to remote signed or unrestricted. Otherwise, the scripts might not run due to policy restrictions.
Add PowerShell Script to Windows Startup
The easiest way to run a PowerShell script as soon as the computer starts is by adding the script to the startup folder. Here’s how to do it.
First, press Windows key + R to open the run dialog box. In the dialog window, enter shell:startup and click OK to open the Windows startup folder.

In the startup folder, right-click and select New and then Text Document to create a new text file. After that, double-click on the text file to open it in Notepad.

Once it opens, paste the following command while replacing the example path with the actual path of your PowerShell script. After that, press Ctrl + S to save the file and then close it by clicking the X button on the title bar.
powershell "C:\path\to\powershell\script.ps1"

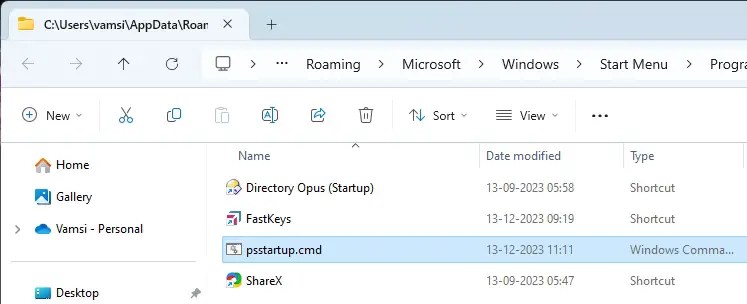
Now, select the file, press F2 on your keyboard, rename the text file to ‘psstartup.cmd‘ and press Enter. Click Yes in the confirmation window. You can change the file name to whatever you want, just make sure that you change the file extension from .txt to .cmd.
Note: If you don’t see the file extension, ensure your file explorer settings show file extensions.
That’s it. Close the Startup folder window and you are good to go. From now on, the PowerShell script will run automatically on startup.
Use Task Scheduler to Run PowerShell Script When Computer Starts
As an alternative, you can also schedule the PowerShell script to run on startup. This method is particularly useful if your script requires administrative privileges.
First, click on the Windows logo, search for Task Scheduler in the Start menu, and click on the top result to open the Task Scheduler application.

Once it opens, click on the Create Basic Task option on the right sidebar.

Enter a name of your choice in the Name field and click Next.

In the Task Trigger window, choose When the computer starts option and click Next.

Choose Start a program in the Action window and click Next.

In the Start a Program window, enter powershell.exe in the Program/Script field and add the path to your PowerShell script file in the Add arguments field. Click Next to continue.

Click the Finish button to complete creating the scheduled task.

(Optional) If your PowerShell script requires administrative privileges, find the scheduled entry in the task scheduler’s window, right-click on it, and choose Properties. Next, navigate to the General tab, select the Run with highest privileges checkbox, and click OK.

That’s it. From now on, Task Scheduler will automatically run the PowerShell script on system startup. Optionally, you can also delay the scheduled startup if you don’t want to slow down your system or increase the startup time.