Want to have more than one OneDrive account on your computer? Here is how to add a second or multiple OneDrive accounts in Windows 10.
For many Windows users, OneDrive is the most preferred choice for cloud storage. Most work, corporate, and commercial places require a Microsoft account and OneDrive for cloud sync and storage. One of the main reasons for this is OneDrive’s ease of use and deep integration with Windows 10 and Windows 11. After all, OneDrive comes pre-installed both in Windows 10 and 11. In addition to that, OneDrive gives you better control over file sync compared to other cloud services.
Considering the popularity of OneDrive and its varied use cases, it is natural to have multiple OneDrive accounts. For example, maybe you have separate OneDrive accounts for work and personal uses. In those cases, wouldn’t it be nice if you can add more than one OneDrive account to your computer?
Thankfully, Microsoft thought of that and added an option to add a second OneDrive account in Windows 10 and 11 operating systems. In fact, you can add multiple OneDrive accounts (more than two) to Windows. You need to know how to do it.
In this quick and straightforward OneDrive guide, I will you how to add another account to OneDrive in Windows 10 and 11. Follow the steps listed below, and it will be done in no time.
Important note: You cannot add two or more personal OneDrive accounts in Windows 10. You can only add personal and business accounts.
How to add another OneDrive account in Windows 10
To add another account to OneDrive, you can use the “Add an account” feature. Once added, you will see a second OneDrive folder in the File Explorer and a separate OneDrive icon on the taskbar. It makes it easy to use both or multiple OneDrive accounts at the same time. Here is how to do it.
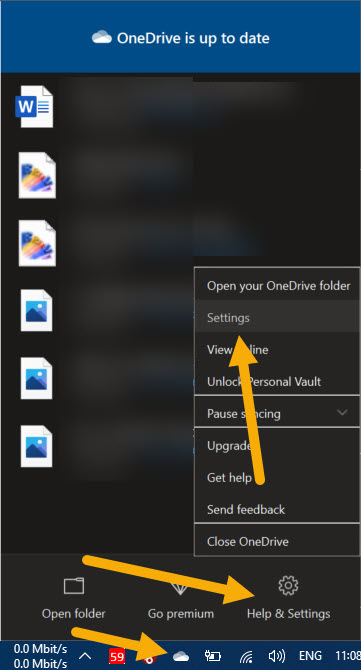
Step 1: We need to open the OneDrive settings window. To do that, right-click on the OneDrive icon on the taskbar and select the “Settings” option. Sometimes, you might have to click the “Help & Settings” button to see the Settings option.
Step 2: The above action will open the OneDrive settings window. Go to the “Account” tab and click on the “Add an account” button. This is the feature that allows you to add a second Microsoft account to OneDrive in Windows.

Step 3: Now, type the email address of your personal or business OneDrive account and click the “Sign in” button.

Step 4: Type the password of your Microsoft account and click the “Sign in” button.
Step 5: The above action will sign you in to the OneDrive account. The wizard also shows the default OneDrive folder location for the new account. Click the “Next” button.
Step 6: From here, the wizard will show all the features of OneDrive. Click the “Next” buttons in the following screens to continue.
Step 7: Finally, click the “Finish” or “Open my OneDrive folder” button to complete the setup process.
With that, you are done adding a second OneDrive account to Windows 10. As I said earlier, you will see another OneDrive folder in the File Explorer and an additional OneDrive icon on the taskbar. You can use these to access the relevant OneDrive account.
If you ever want to remove a OneDrive account, open the OneDrive settings of the target account (right-click on the OneDrive icon and select “Settings”), go to the “Accounts” tab and click the “Unlink this PC” link.
That is it.
It is that simple to add another OneDrive account to Windows 10.
I hope that helps.
If you need help, comment below. I will do my best to help you.