


If the default workgroup name is not to your liking, you can easily change it. Follow these steps to easily change the workgroup name in windows 10.
Windows by default set the name of the workgroup as just “WORKGROUP”. With just a few clicks, you can join the workgroup in your network to set up proper file sharing and printing across the network. Some of the advantages of a workgroup include PCs acting as peers, must be part of a local network, a limited number of PCs in a group, etc.
As you can guess, the default name is pretty simple and self-explanatory. For most users, the default name is pretty inconsequential and easy to remember and use. As long as you have the same workgroup name on all your local machines, they should have no problems joining the workgroup. However, if you want to customize the name, you can change the workgroup name in Windows. This is especially helpful when you have or want multiple workgroups in a network.
In this quick and simple guide, let me show the steps to modify the workgroup name in windows 10.
Jump to:
How to Change Workgroup Name in Settings
Just like the computer name, you can use the Settings app to change the Workgroup name. Here the exact steps to follow.
- On the keyboard, press “Win + I” keybinding to open the Settings app.
- After opening it, go to the “System” page.
- Here, select the “About” tab on the left panel.
- Now, click on the “System info” link under “Related settings“.
- This opens the System window. Click on “Advanced system settings” on the left panel.
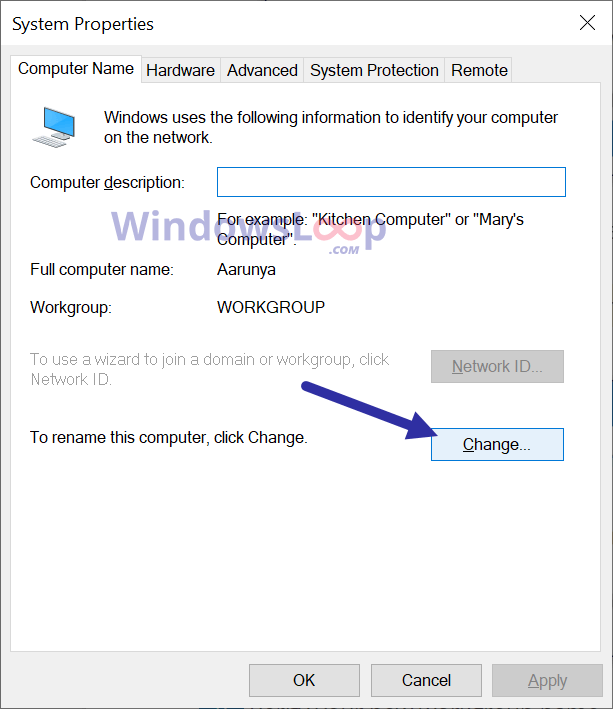
- Go to the “Computer name” tab.
- Now, click on the “Change” button.
- In the next window, type the new workgroup name in the “Workgroup” field.
- Press “Ok” to confirm the name.

- Click “Apply” and “Ok” to changes in the main window.
- Click “Ok” on the welcome screen.

- Press “Ok” in the second confirmation window.

- Click “Close” in the main System Properties window.
- When prompted to restart, click the “Restart now” button.


After restarting the system, the workgroup name is changed. You can now use this workgroup to join a local network group. Keep in mind all the machines should have the same workgroup name to join the same group.
Change Workgroup Name in Command Prompt
You can use the WMIC command to change the workgroup name in Windows 10.
- First, press the Start key to open the Start menu.
- Type “Command Prompt” in the start menu search bar.
- Right-click on Command Prompt and select “Run as administrator“.
- After opening the Command Prompt as admin, execute the below command. Don’t forget to replace “NewWorkgroupName” with the actual workgroup name you want to set.
wmic computersystem where name="%computername%" call joindomainorworkgroup name="NewWorkgroupName"
- Next, close the Command Prompt window.

- Restart Windows 10 to apply the changes.

After restarting the system, the new workgroup name applied. You can see the new name in action in the System window. To join a workgroup, make sure all the other machines also have the same workgroup name.
That is all. It is that simple to modify the workgroup name in windows 10. If you are stuck or need some help, command below and I will try to help as much as possible.