To backup Thunderbird emails, you need to export the Thunderbird profile. Here’re the steps to backup the Thunderbird profile.
If you have a lot of emails or email accounts added in the Thunderbird email client, it is important that you backup Thunderbird regularly. Backing up will help you restore Thunderbird email client and all email accounts in it when needed.
Thunderbird stores all your email accounts and emails in a profile. By backing up the Thunderbird profile, you are effectively exporting all the Thunderbird emails and email accounts. In this quick article, let me show you the process of backing up the Thunderbird profile in Windows.
The steps shown below will work on Windows 7 and 8 too.
Steps to Backup Thunderbird Profile
To backup the Thunderbird profile or emails, follow the below steps.
- Press “Windows Key + R” to open the “Run” dialog box.
- Type “%appdata%/Thunderbird” in the blank field.
- Click the “Ok” button.

- In the Thunderbird directory, press “Ctrl + A” to select all the files and folders.
- Copy them with the “Ctrl + C” keyboard shortcut.

- Press “Ctrl + V” to paste the copied folders in the backup folder of your choice.


That is it. You are done backing up the Thunderbird email and profiles.
The “profiles” folder contains all the Thunderbird profiles and the “profiles.ini” file links those profiles with the Thunderbird email client. So, both these folders are important to backup. You can generally ignore the “crash reports” and “pending pings” folders as they are not necessary for the profile or emails.
Important: Make sure that you keep your backup folder in a safe place. Never share the backup folder with anyone. Anyone with access to the thunderbird backup folder can access all your email accounts and emails.
Restore Thunderbird Profile to Restore Emails and Email Accounts
After backing up Thunderbird, you can use the backup to quickly restore Thunderbird on a new system or when you reinstall Thunderbird in Windows.
These are the steps you should follow to restore the Thunderbird email or profile.
- Close Thunderbird if it is opened or running in the background.
- Select the “profiles” folder and “profiles.ini” file.
- Press “Ctrl + C” to copy them.

- Now, press “Windows Key + R” to open the “Run” dialog box.
- Type “%appdata%/Thunderbird” and click the “Ok” button.
- In this directory, press “Ctrl + V” to paste the copied folder and file.
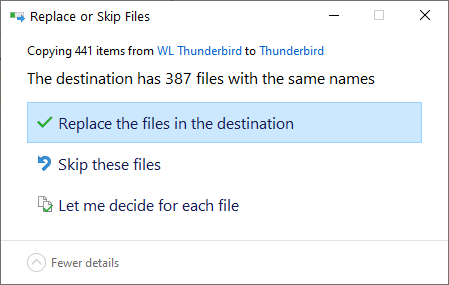
- You will see a warning window, click on the “Replace the files in the destination” option.


That is it. Once the files are copied from the backup folder to the Thunderbird folder, you are done restoring the thunderbird emails and profile. Open the Thunderbird email client and you should see all your email accounts and emails ready to go.
Wrapping Up – Backup Thunderbird
As you can see, it is rather easy to backup and restore Thunderbird in Windows. All you have to do is backup the Thunderbird profile and restore it in the same location when needed. Typically, I backup the thunderbird profile to my OneDrive account so that I can access it on my laptop and restore it as and when needed.
To automatically backup thunderbird emails on a schedule, you can use FreeFileSync, a free file sync software for Windows. Having regular scheduled automatic backups ensures you have all the emails and email accounts up to date.
I hope that helps.
If you are stuck or need some help, comment below and I will try to help as much as possible. If you like this article, do check out how to enable Windows Defender sandbox mode in Windows 10 to improve system security.
Thank you for explaining perfectly how to back-up Thunderbird. Doing so took 5 minutes at most. Bookmarking your website! ?
I’m glad the tip helped you. Thanks for the bookmark ?
I have an extensive set of Local Folders, sub-folders, sub-sub-folders, etc., on my current laptop version of Thunderbird (in Win 10). So far I have not been able to reproduce this structure on the desktop computer to which I wish to transfer my principle working location. While I have been able to copy several years worth of emails stored in those various folders, they come over without the folder structure. To reproduce the folder structure and manually move the emails into the required locations would be many evenings work.
I would welcome any comments on this issue. Oh! I forgot to mention that I use POP3 email for incoming.
Thanks
John
Sharing Emails: I am running Thunderbird on a Desktop, a laptop & a netbook. All Win 10 Pro. All have the same Dropbox account access. I have 10 POP accounts that I monitor.
I am wanting to put my ‘profile’ on all 3 devices… Check/send mail on any one of the devices and have Dropbox ‘Sync’ to the other two devices.. Suggestions appreciated!!!
Try FreeFileSync software. It lets you sync contents between two folders. Using FreeFileSync you can sync the thunderbird folder with a folder in your Dropbox account. Do the same thing on other systems and you will have a synchronized email app.
I haven’t tried it personally so backup the thunderbird profile before trying.
[ Solved – I hope ] I found this article, https:// support.mozilla. org/en-US/kb/moving-thunderbird-data-to-a-new-computer – Followed steps exactly, copying the Thunderbird folder from one PC to a ‘Public’ or ‘Shared’ folder. (Path= C:\Users\\AppData\Roaming\Thunderbird ) Then pasted it to Path= C:\Users\\AppData\Roaming\ ) then Then pasted it to Path= C:\Users\\AppData\Roaming\ ) ** CAUTION ** Before pasting, I went into each of PC-1 & PC-2 Thunderbird folders and ‘renamed’ the Profiles.ini files to BU_Profiles.ini so I could revert in case it failed. — The only thing I see is the number of ‘unread messages’ appears different when I go to another device, BUT it updates when I click on that folder. ** Another CAUTION** – Give Dropbox time to Sync when switching to another device.
CORRECTION [ Solved – I hope ] I found this article, https:/PC-1/support.mozilla.org/en-US/kb/moving-thunderbird-data-to-a-new-computer – Followed steps exactly, copying the Thunderbird folder from one PC to a ‘Public’ or ‘Shared’ folder. (Path= C:\Users\\AppData\Roaming\Thunderbird ) Then pasted it to Path= C:\Users\PC-2\AppData\Roaming\ ) then Then pasted it to Path= C:\Users\PC-3\AppData\Roaming\ ) ** CAUTION ** Before pasting, I went into each of PC-1 & PC-2 Thunderbird folders and ‘renamed’ the Profiles.ini files to BU_Profiles.ini so I could revert in case it failed. — The only thing I see is the number of ‘unread messages’ appears different when I go to another device, BUT it updates when I click on that folder. ** Another CAUTION** – Give Dropbox time to Sync when switching to another device.
Thanks for the clear instructions. It worked for me in Windows 10 even though I had multiple emails in Thunderbird and lots of emails and different address books and lists and all copied correctly. I was using Thunderbird 78.2, the most recent version.