On a daily basis, I work with a lot of images a.k.a, screenshots. Often times, I find myself needing to resize an image to a certain dimension so that the image fits perfectly in a page or just to reduce its size. Generally, I use the screenshot program ShareX from Microsoft Store to quickly resize the image. However, it is a bit cumbersome process. So, I did some hunting and found a neat little software that makes it easy to resize an image using the right-click context menu.
So, just like me, if you want an easier way to resize images in Windows 10, here’s how to add an image resize option to the right-click context menu in Windows 10, 7, and 8.
Resize Image From Right-click Context Menu
Windows has no built-in or native context menu option to quickly resize images. However, you can add the resize option to the right-click menu by installing a free, lightweight, and open-source software called ImageResizer. Just follow the below steps and you will be good.
1. To get started, download ImageResizer from the official Github page. The download size is just under 2MB. Once downloaded, double-click on the installer and install it like any other Windows software.
2. After installing the software, close the installer. Since all the software does is add an option to the right-click menu, you will not see any entry for it in the start menu. However, right-click on any image in the file explorer and you will see a new option called “Resize Pictures” option.
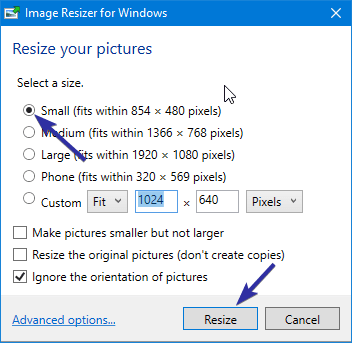
3. To resize an image, right-click on an image in the file explorer and select the Resize Pictures option. This action will open the ImageResizer window. Here, select one of the pre-defined image sizes and click on the “Resize” button.
4. One of the good things about the program is that by default, it will not modify the original image. Rather, it creates a duplicate copy with the modified size in the same folder as the original image. You can see the new modified image with the word “custom” added to it.
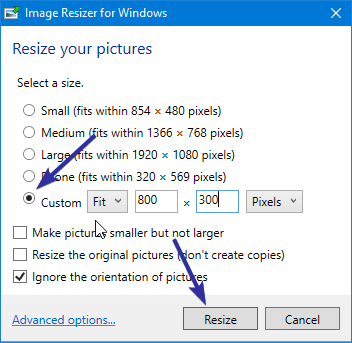
5. If you want the image to be a specific size, select the “Custom” radio option, enter the dimensions in the fields next to it and click on the “Resize” button. Keep in mind that the program will resize the image proportionally. It will not distort the image by changing the height or width individually.
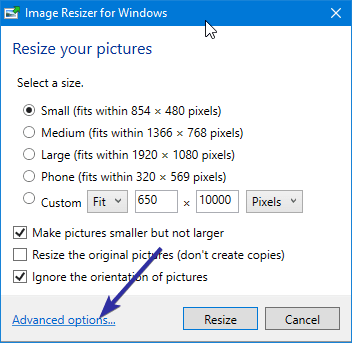
6. If you are finding yourself often resizing images to a specific dimension then you can create your own size option. This allows you to simply select the appropriate radio option rather than enter the dimensions manually. To create a new size, click on the “Advanced Options” link appearing at the bottom of the window.
7. In the settings window, click on the “Create a new size” link, enter the name, select “Fit”, enter new dimensions, and click on the “Ok” button to save the changes. When needed, you can also change the pre-defined dimensions to meet your needs.
8. The new size option will now appear in the main window where you can select it with a single click.
That is all. As you can see, using simple, free, and open source software, we’ve added the useful image resize right-click option which makes our life easier, just a tad bit. Hope you like the tip.
If you like this article, do check out how to add folders or programs to send to menu in the right-click context menu and how to fix blurred images in the Photos app.


love it!
Would’ve been good, but it doesn’t seem to support transparency, which makes it useless
It works once then doesnt work again
ive used this so much in the past but with win 10 its hit & miss