PowerShell has a neat little command to backup installed Windows drivers. Here’s that command to backup drivers in Windows 10 & 11.
For every hardware device connected to the system, Windows needs to install a compatible driver to work correctly. Though Windows 10 and 11 operating systems can automatically download the drivers and install them for you. Specific drivers like the Graphics driver need to be installed manually to ensure that they are up-to-date and compatible.
After installing all the drivers, you can use a simple PowerShell command to backup drivers. This backup helps you restore them as and when needed without looking for them in the CD/DVD driver or on the internet.
For example, when you reinstall or restore Windows from a backup, you can use the driver backup created using the PowerShell command to restore drivers. Restoring the driver backup is simpler than downloading and installing individual drivers manually.
So, without further ado, use this PowerShell command to backup Windows drivers.
Note: The steps below will work in Windows 10 and 11 operating systems.
Table of contents:
Backup drivers with PowerShell command
Using a single PowerShell command, you can backup all installed drivers on your Windows computer. All you have to do is open PowerShell as admin and run the command. Let me show you the exact steps.
1. Open the start menu.
2. Search for PowerShell and click on the “Run as Administrator” option to open PowerShell with admin rights.
Note: In Windows 11, you can open Terminal as admin and then open PowerShell. To open the Terminal with admin rights, right-click on the Start menu and choose “Windows Terminal (Admin).”
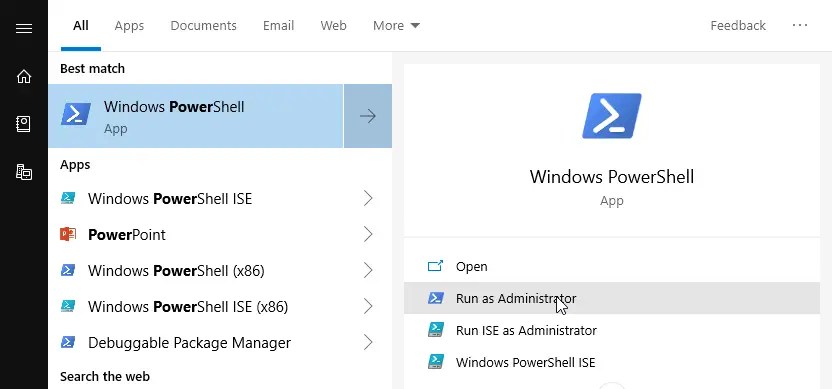
3. In the PowerShell window, execute the below command. Don’t forget to replace D:\BackupDestination with the actual folder path where you would like to save the driver backup.
Export-WindowsDriver -Online -Destination "D:\BackupDestination"
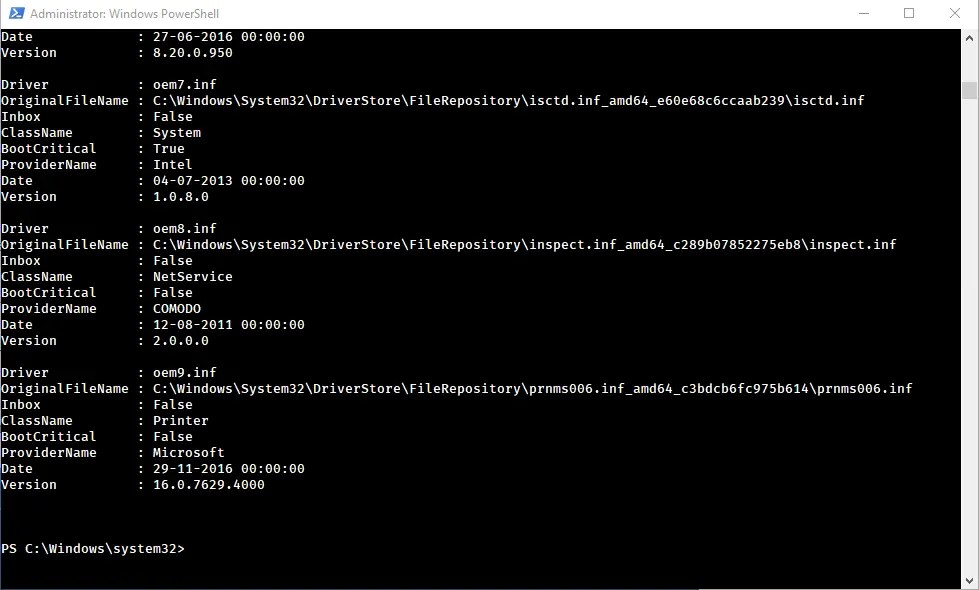
4. After executing a command, give PowerShell a few seconds, and it will backup all the installed drivers. You will see the output something like the below image. Of course, the output will differ depending on the installed drivers.
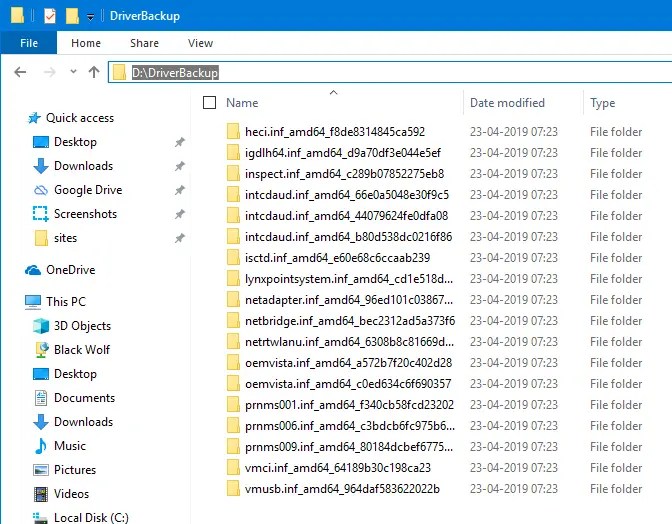
5. To verify, open the destination folder in the File Explorer, and you will see that Windows has backed up drivers with the PowerShell command. The good thing is that every device driver is in its own folder.
Keep this folder safe and secure so that you can use it to restore drivers as and when needed.
Related: How to disable automatic driver installation in Windows 10.
Restore drivers from PowerShell backup
Of course, you are backing up all the installed drivers so that you can restore them when needed without having to download them again.
Interestingly, we will use the Device Manager to restore the drivers. No need for another PowerShell command. This is because Windows uses device IDs as the driver names. This makes it hard to find the relevant driver for a particular device.
The good thing is, when using the Device Manager, you don’t have to deal with that. The Device Manager will take care of finding the relevant driver from the backup. So, follow the below steps to restore backed-up drivers.
1. Open the start menu.
2. Search for “Device Manager” and open it.

3. In the Device Manager, find the device you want to install the driver for, right-click on it, and choose “Update Driver.”

4. In the Update Driver window, select the “Browse my computer for driver software.”

5. In this window, click the “Browse” button.
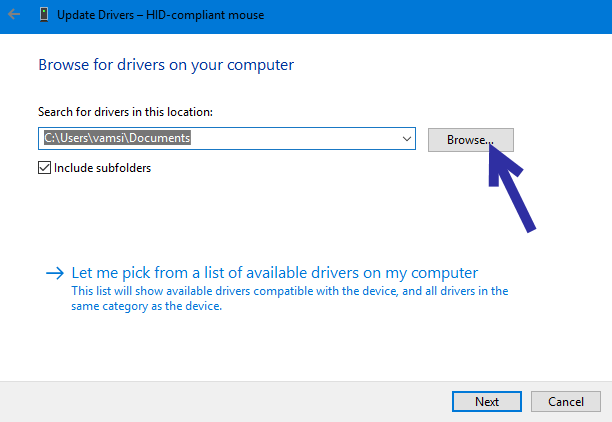
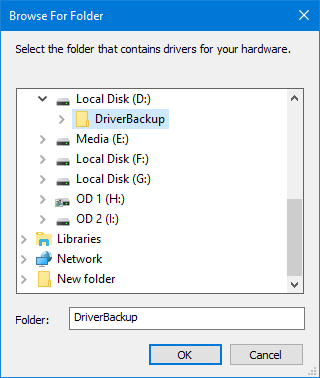
6. The above action will open the Browse window. Here, find the driver backup directory and select it. Remember, just select the root backup directory. There is no need to choose a folder inside the backup folder.
7. Ensure the “Include Subfolder” checkbox is selected and click on the “Next” button.
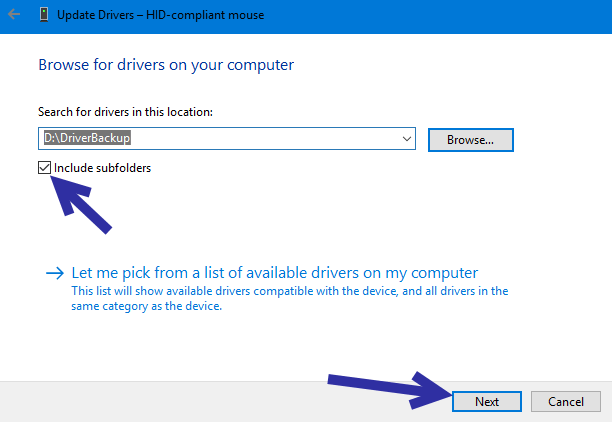
8. Windows will now scan the backup folder, finds the relevant driver, and installs it.
9. After installing the driver, Windows will show a confirmation window. Close it.
10. Reboot Windows to apply the driver changes.
That is it. As you can see, it is pretty easy to backup drivers using the PowerShell command. It is also easy to restore them when needed.
I hope that helps. If you are stuck or need some help, comment below, and I will try to help as much as possible.
If you like this article, check how to backup Windows 10 to a network drive and how to back up the start menu layout.
very good sussefull