You can partition the USB drive in Windows for better data storage and management. Follow these steps to create partitions in the USB drive.
In general, almost every one of us uses partitions so that one big hard drive turns into multiple smaller drives. This allows us to better manage our data by putting it in various folders and drives. However, when it comes to USB drives, we use them with one partition, no matter the size. For the most part, this is not an issue. However, if you have a big USB drive and want to use it for multiple purposes, is it not better if it can act like multiple drives?
For instance, you can install a bootable OS in one partition and use other partitions for data storage. Thankfully, you can easily partition the USB drive in Windows using a built-in tool. Let me show you how.
Caution: To partition a USB drive, we need to format the drive. So, back up any data in it to a safe location.
Partition USB Drive in Windows
Before creating partitions in a USB drive, make sure that it is plugged into your system and has no data in them. The partitioning process will delete all data irrecoverable.
- Press the Start key on your keyboard.
- Search and open “Create and format hard disk partitions.”
- Find the USB drive in the Disk Management window.
- Right-click on the drive.
- Choose the “Delete Volume” option.
- Press the “Yes” button to confirm.
- The USB drive is marked as “Unallocated.“
- Right-click on the unallocated USB drive.
- Choose the “New Simple Volume” button.
- Click “Next.”
- Type space in MBs in the “Simple Volume Size in MB” field.
- Press “Next” to continue.
- (Optional) Choose a drive letter and press “Next.”
- Choose a file system and click “Next.”
- Press “Finish.”
- With that, you created a new partition in the USB drive.
- Follow steps 8 to 14 to create another USB partition.
- Once done, close the Disk Management tool.
- You will see the new partitions in the File Explorer.
- With that, you created two or more partitions in the USB drive.
Steps with more details:
1. Open the start menu and search for partition. Click on the Create and format hard disk partitions option from the search results.

2. The above action will open the built-in disk management tool. You will see all your drives in the main panel. Under the main panel, scroll down, and you should see the plugged-in USB drive with its own disk number. In my case, the USB drive is named Disk 3. Right-click on the USB drive and select Delete Volume.

3. You will see a warning message telling you that the data in the USB drive will be lost. Click the Yes button to continue.

4. As soon as you click the yes button, Windows will delete the volume. Once that is done, the disk management tool will mark that empty space as Unallocated.

5. Now, right-click on the unallocated volume and select the New Simple Volume option.

6. The above action will open the volume creation wizard. Click on the Next button to continue.

7. In this window, type the space you want the first USB partition in MBs (megabytes) in the “Simple volume size in MB” field and click the Next button. In my case, I want the first USB partition to be around 4.5 gigabytes.

8. Here, assign a new drive letter or let the default be and click the Next button.

9. Now, select the file system of your choice. If you don’t know what to choose, let the defaults be. Also, you can name the partition anything you want. Type the name of your choice in the Volume Lable field. Click on the Next button.

10. Finally, click on the Finish button.

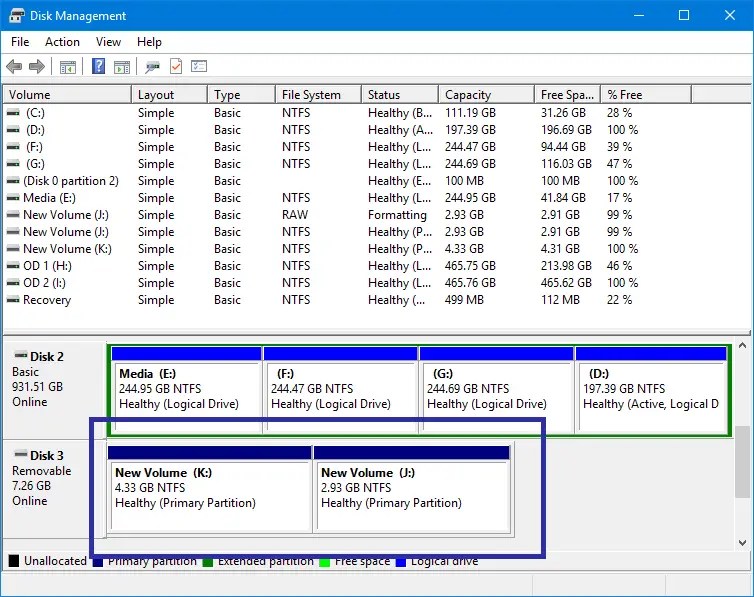
11. You will now see a partitioned USB drive in the Windows disk management tool. Of course, apart from the partition we just created, all the other space is marked as unallocated.

12. Go through steps 5 to 10 again and create a new partition according to your need. In my case, I’m allocating all the remaining space to a new partition.


13. That is it. You’ve successfully partitioned the USB drive in Windows.

14. If you open the file explorer, you will see two new partitions appear in the file explorer. Of course, no matter what computer or operating system you plug in the USB drive, you will see the partitioned USB drive rather than a single drive. You can use these partitions as you wish.

I hope that helps. As you can see, it is relatively easy to partition a USB drive in Windows using built-in tools.
If you like this article, check out how to format the USB drive using command prompt commands and create Windows 10 USB installer.
Image credit: Karolina Grabowska
Thank you so much! Helped me a lot.
This has been very simple and so helpful. You made it look easy and straight forward.
Thank you so much.
Nice and easy, thank you.
Now can I make one of the new drives bootable? Say for emergency restore.