FFmpeg is one of the most popular, free, and open-source multimedia tools to encode, decode, and convert media files. This step-by-step tutorial shows you how to install FFmpeg on Windows, add FFmpeg to the Windows path, and verify FFmpeg installation. Even if you are a beginner, the steps listed below will be easy to follow. Let’s get started.
Steps to Install FFmpeg on Windows
Because FFmpeg is a portable command line application, Installing it is a bit different from installing general software. That being said, it is just as easy. You can install FFmpeg in four simple steps. i.e., download FFmpeg, extract FFmpeg files to a folder, add FFmpeg to Windows path, and verify FFmpeg installation. Let me show you how to do it.
Step 1: Download FFmpeg on Windows
First, click here to open the FFmpeg developer website. After that, click the “Windows” icon under the “Get packages & executable files” heading and then click the “Windows builds from gyan.dev” link.

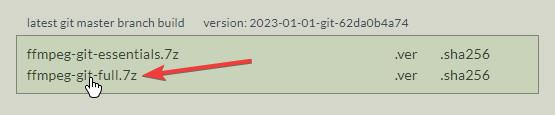
The above action will open a new website called gyan.dev. On that page, click on the “ffmpeg-git-full.7z” package link.
This action downloads FFmpeg in 7z archive format to your downloads folder.
Step 2: Extract FFmpeg to a Folder
After downloading the FFmpeg archive file, find the downloaded file in your Downloads folder and extract it with zip software such as 7-Zip or WinRAR. To extract the 7z file, right-click on it, and choose the “7-Zip -> Extract here” option. If you are using WinRAR, select “WinRAR > Extract here.”
The above action will extract contents to a new folder in the same directory. By default, the extract folder’s name may contain the current FFmpeg version and build number. For ease of use, I recommend renaming the extracted folder to “ffmpeg.” Though not necessary, renaming the folder makes adding it to the Windows path easy.
Next, move the folder to the root of the C drive. Just like renaming, this step is entirely optional. However, this makes it easy to add the folder to the Windows path.

Step 3: Add FFmpeg to the Windows Path
To complete the installation process, we must add FFmpeg to the Windows Path environment variable. Adding FFmpeg to the path allows you to execute FFmpeg commands directly from any folder. i.e., without having to navigate to the FFmpeg folder first. Here’s how to do it.
On Windows 11 & 10:
First, press the “Start” button on the taskbar, search for “View advanced system settings,” and open it. Go to the “Advanced” tab in the System Properties window and click on the “Environment Variables” button at the bottom.

The above action opens the Environment Variables window. Here, Select the “Path” variable under the “User variables” section and click “Edit.”
Note: If you want to add FFmpeg to the path for all users, select the “Path” variable under the “System Variables” section.

Once you are in the “Edit environment variable” window, click on the “New” button.

Type “C:\ffmpeg\bin” in the blank field and click on the “OK” button.
Note: If you’ve placed the FFmpeg folder in some other folder or drive, change the directory path accordingly.

Once FFmpeg is added to the Windows Path variable, this is how it looks in the main Environment Variables window. Click on the “OK” button to save changes.

That’s it. Close the main window, and you are good to go.
On Windows 7 and 8:
Adding FFmpeg to Windows 7 path is similar to Windows 10 and 11, but the user interface is slightly different. Let me show you how to do it.
Open the Start menu by pressing the “Start” key on your keyboard. Next, search for “Edit System Environment Variables” and click on the result. After opening it, go to the “Advanced” tab and click on the “Environment Variables” button. Find and select the “Path” variable under “System Variables,” and click on the “Edit” button.

Go to the end of the line in the “Variable Value” field and add ;C:\ffmpeg\bin. Click on the “OK” button to save changes. Each path you add to the value field should be separated by ;.

Note: If the FFmpeg folder is in some other folder or drive, change the path accordingly.
Step 4: Verify FFmpeg Installation
After installing FFmpeg on Windows, it is prudent that you verify the installation. That way, you can be sure that you can execute FFmpeg commands, and third-party applications that rely on FFmpeg can recognize and use FFmpeg. Here’s how to check if FFmpeg is installed properly on Windows:
First, right-click the “Start” icon on the taskbar and choose “Terminal.” You can also open PowerShell or Command Prompt directly by searching for it in the Start menu.

After opening the terminal or Command Prompt window, type ffmpeg, and press the Enter key on your keyboard. If FFmpeg is installed and correctly added to the Windows path, you will see the FFmpeg version number and its configuration details. Typing ffmpeg -h will show the full list of commands you can use with FFmpeg.
If you haven’t installed FFmpeg or added it to the Windows path properly, you will encounter the “ffmpeg is not recognized as an internal or external command” error message.

With that, you’ve successfully installed FFmpeg on Windows.
Install FFmpeg on Windows Video
As a compliment to this text tutorial, I’ve also created a video tutorial. In the video, I’ll walk you through the entire process step by step, highlighting important points and providing helpful tips along the way. Do check it out.
Frequently asked questions (FAQ)
Here are a few frequently asked questions on FFmpeg, its installation process, common errors, and other issues:
FFmpeg is free and open-source software. You can download FFmpeg directly from the developer’s website. You don’t have to pay to download, install, or use FFmpeg on Windows.
You can install FFmpeg in four steps. First, download FFmpeg, extract the archive file to a folder,add the folder to the Windows path, and verify the installation by typing ffmpeg in the Command Prompt window. For detailed steps, follow the steps above.
To check if FFmpeg is installed on your Windows machine, open Command Prompt, type “ffmpeg,” and press “Enter.” If FFmpeg is installed, you will see its version number and configuration details. If FFmpeg is not installed, you will see the “ffmpeg is not recognized as an internal or external command” error message.
If you are seeing a “FFmpeg dll is missing” error, it means that the FFmpeg library file, which is required for the program to run, is not present on your system. To fix this error, you will need to remove the old installation and reinstall FFmpeg on Windows.
This error usually means that FFmpeg is either not installed or not added to the Windows path. Simply reinstall FFmpeg and add it to the Windows path to fix the “FFmpeg is not recognized as an internal or external command” error.
That is all. It is that simple to install and add FFmpeg to the Windows path. I hope this simple and easy Windows how-to guide helped you.
If you are stuck or need help, send an email, and I will try to help as much as possible.
Thanks for the tutorial….like it…
YAY! I’m a Windows geek now. Thank you.
Didn’t work with me, Command Prompt still shows previous version number, even after restart.
Sorry, I didn’t get it. If the command prompt is showing FFmpeg version number that means it is working. If you think you are not using the latest FFmpeg version then download it from the official website and replace ffmpeg folder in your C drive with the downloaded one.
No, I had downloaded latest FFmpeg version and done exactly what you explain, but Command Prompt was still showing a 2016 version number. But I wasn’t starting Command Prompt with Admin rights. When I start it WITH Admin Rights, it indeed show the latest version number (4.02). Why ? I don’t know at all 🙂
Maybe check if you have multiple versions of FFmpeg. Also, see where you’ve added the FFmpeg path and to what location. If you look at step 8 you see that there are two places where you can add the path. The first one is for your user account and the second one is for the entire system.
Hi, I need to know how to download raw file using ffmpeg and download the subtitle also. I need to download raw video and audio without convert to mp4. Please help me. Thank you.
I don’t understand what you mean by raw file. Generally, the ability to download video, audio, and subtitles completely depends on the type of input stream.
ImportError: DLL load failed while importing cpp_process: The specified module could not be found.
do you have a tutorial to add ffmpg to linux mint i canot find anything to help me download
HLS video I HAVE NO IDEA AS TO HOW TO DO THIS, CAN YOU HELP?
To install FFmpeg on Linux Mint, follow the instructions shown here: https://linuxize.com/post/how-to-install-ffmpeg-on-ubuntu-18-04/. Though the instructions are for Ubuntu, it should work on Linux Mint.
To download HLS videos, follow the instructions shown here: https://windowsloop.com/download-m3u8-video-with-ffmpeg/
Yea!!It worked just fine.
That’s awesome.
THANK YOU SO MUCH!!
WAS SO EASY!
REALLY THANKS A LOT !
I’m still having a bit of trouble on the part where it says “Here, enter “C:\ffmpeg\bin\” and click on the “Ok” button. If you’ve placed the FFmpeg folder in other drive or folder then change the directory path accordingly.” and I don’t know how to link it from the downloads area… sorry if you can’t answer this, but it’s SUPER hard
No matter where you place the FFmpeg folder, assuming you’ve extracted it, just open FFmpeg folder, go to the “bin” folder inside it and then click on the File Explorer address bar. It will reveal the actual folder path. Copy that path and follow the instructions again.
how to capture a screen from an external device (frame grabber) connected to the PC using cmd?
Sorry Nikhil, I have no idea how to do it.
Thanks 🙂
How do i add ffmpeg command inside a java program ?
That should be a question for StackOverflow. See if you can find any libraries.
Thank you!
Thank You, You are Awesome, It works in 5 mins 🙂
In ffmpeg 4.2.2 there is no “bin” folder.
Also, there is no *.exe file.
so … ?
oh. i downloaded the source code. now i have downloaded a windows executable. works. thanks.
how to run php file and executed.help me please
Thanks. These instructions helped me solve my problem getting FFMPEG to work. However, the CMD still doesn’t recognise it as a Command.
I also found that manually entering in the File Path to edit the Environment Variables didn’t work for me, but using the Browse option (not mentioned) did.
THANKS. That’s an EXCELLENT tutorial with a very effective mix or text and graphics. The screen graps clearly show where and what to click and expect to see next. The text explains without loosing the key steps in the process.
I’m happy the guide helped you. Have a nice day.
Thanks! It worked for me! I am so happy – I have spent a few hours looking elsewhere today and now everything is working great!
I’m glad the guide helped you Jenny. Have a nice and safe day.
Hi, i downloaded ffmpeg bcoz i thought i needed it for audacity. Audacity says my mp4 “file is an Advanced Audio Coding file. Without the optional FFmpeg library, Audacity cannot open this type of file. Otherwise, you need to convert it to a supported audio format, such as WAV of AIFF.”
Do you have any idea why Audacity is still saying the same thing even after I installed ffmpeg? I already verified it with Command Prompt. Thanks
It might be that Audacity is not detecting the FFmpeg library. Try to set it in the preferences window. Go to “Edit > Preferences > Libraries”, click on the “Locate” button and select the FFmpeg.
If that did not work, assuming that you’ve already added FFmpeg to the Windows path, you might have to completely uninstall and reinstall Audacity. This will force Audacity to recognize FFmpeg.
I hope that helps.
Thank you for this – but now what – how do I use the prog to edit a video file .sec/.exe file
FFmpeg official site will no longer be available and i guess thats why i am not able to download file. so i am stuck at first step only. now what to do? is there any other alternative and free of cost?
Thanks for letting me know. The official ffmpeg Windows builds are usually supplied by zeranoe. com but now it is being shifted to gyan. dev. I’ve just updated the article with new official link.
thanks a lot!
This is great! My path variable thingy was changed recently because I used another tutorial that didn’t specify to add onto it since it was a windows 10 i think. do you know how to get my path variable back to normal?
How do I completely uninstall previous versions of ffmpeg. I don’t know when I installed it but I have this: ffmpeg version N-89980-ge752da5464. I can’t find the install folder.
Thank you so much for your hard work in guiding us through this process. You are appreciated!
You probably want to include that a system reboot is required after installing the system variable before you can test it in the command prompt or shell. Great tutorial otherwise.
Reboot is not required. You just need to restart the Command Prompt or PowerShell.
how can i change my download location folder?
YAY! I’m a Windows geek now. Thank you.