Want to find or get rid of duplicate files and clean up the system? Here is a simple way to find duplicate files in Windows 10.
If you use a computer for long enough, it is natural to have some duplicate files. This is especially true if you are constantly downloading new files or creating copies of existing files for safekeeping. Though the duplicate files don’t harm anyone, if you don’t keep an eye, they might become hard to keep track of and consume a lot of hard disk space unnecessarily.
The good thing is, being a Windows user, you have many options to find duplicate files. Once you find the same files, you can decide what to keep and what to get rid of.
This quick and straightforward guide will introduce you to simple software that makes finding and analyzing duplicate files easy. Just follow the steps, and the whole process will be done in no time.
Find duplicate files in Windows 10
Since Windows 10 has no option, we will use a free software called “Auslogics Duplicate File Finder.” So, download the software, install it, and proceed with the steps below.
- Open the Auslogics software.
- Select the drives to scan in the middle panel.
- Select the “file types” you want to scan in the right panel.
- Click the “Search” button.
- The app will scan the selected drive(s).
- It will automatically list all the duplicate files.
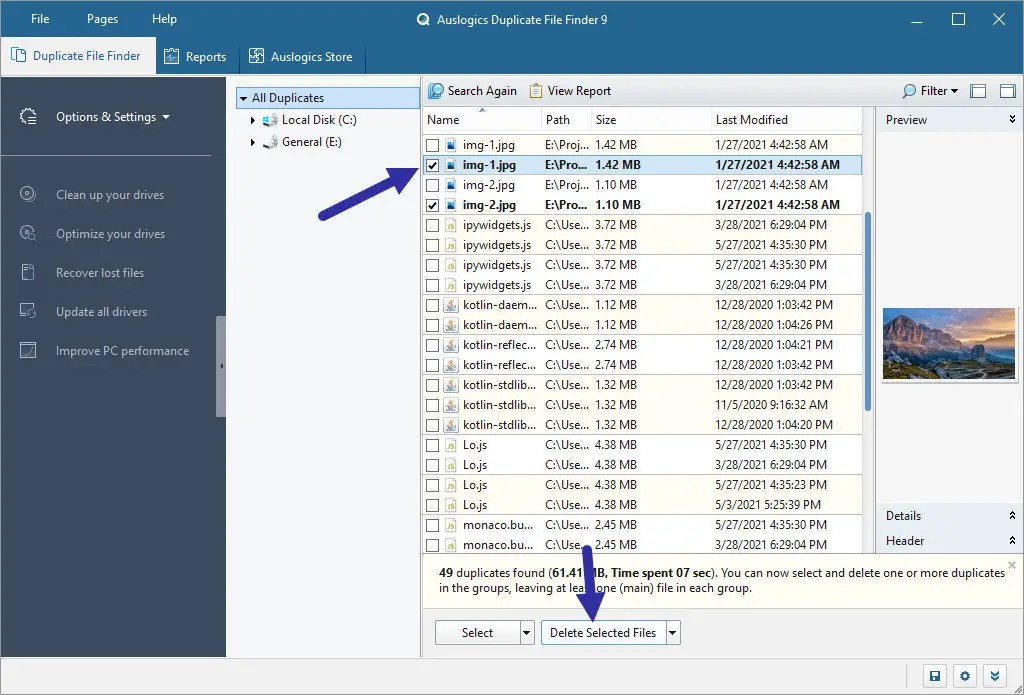
- (optional) You can select the duplicate files and click the “Delete selected files” to delete them.
First, launch the installed Auslogics duplicate file finder software. Next, select the drives you want to scan in the middle panel. In my case, I chose all four drivers. Next, select the file types you want to check on the right panel. If you want the software to scan all file types, select the “Look for all file types” option. Finally, click the “Search” button.

As soon as you click the button, the application will start the scan. Depending on how many files you have and how many file types you selected, the scan can take a while. Once the scan is completed, the application will show a list of all the duplicate files found in the main panel.

Once you found the duplicate files, you have two options. That is, either ignore them or delete them. To delete the same files, select the relevant checkboxes and then click the “Delete selected files” button. This action will delete the files to recycle bin.

That is all. It is that simple to find duplicate files in Windows 10.
A quick tip: To make the whole process a bit faster, you need to narrow down the search scope to a specific drive or folder and file type. For example, if you want to scan for duplicate photos, you should select the drive where the files are saved and set the file type to “Images.”
I hope that helps.
If you are stuck or need some help, comment below, and I will try to help as much as possible.
Image credit: Christiaan Colen