


Seeing “Your Account Has Been Disabled. Please See Your System Administrator” when trying to log in? Here is how to fix it in simple steps.
Windows has an option to disable any user account as long as the user doing it has administrator permissions. When a user tries to log into a disabled user account, the system shows the “Your Account Has Been Disabled. Please See Your System Administrator” message. If needed, an administrator can enable the user account with just a few clicks.
However, what if you are the only user or never disabled the user account and still seeing this message? There are all sorts of reasons why you will see the error message. A few popular reasons include but are not limited to accidentally blocking a user from a second user account, corrupted system files, rogue programs, virus or malware infections, system reset or refresh process, etc.


When Windows users see the “Your Account Has Been Disabled. Please See Your System Administrator” error message, it can be tough to find out what the problem is and fix it. Thankfully, it is pretty easy to fix the problem and enable the user account.
No matter the reason, if you see the “Your Account Has Been Disabled. Please See Your System Administrator” error message in Windows 10 or Windows 11, follow these steps to enable the user account.
Fix the “Your Account Has Been Disabled. Please See Your System Administrator” error
There are two ways to fix the “Your Account Has Been Disabled ” error. If you have a second user account with administrator privileges, follow the first method. If not, follow the second method to create a new admin account using Command Prompt to enable the disabled user account.
1. Enable user account from a second user account
If you have a second user account with administrator privileges, you can easily enable the disabled account from the Command Prompt. Here is how.
First, log into the second user account. Next, open the Start menu, search for “Command Prompt,” right-click on the result and select the “Run as administrator” option.


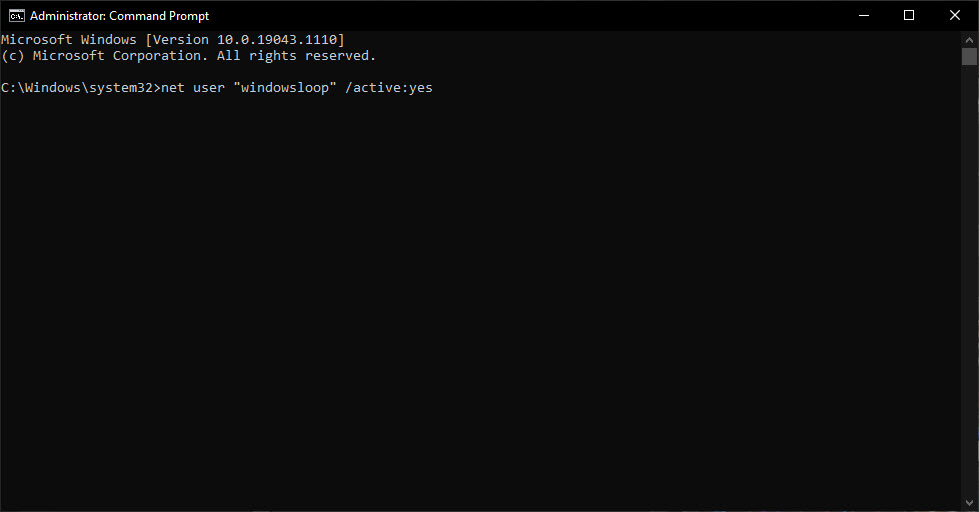
The above action will launch the Command Prompt with admin rights. In the command window, type the below command and press Enter. Replace the dummy user name with the actual user name of the disabled account. In my case, the user account name is “windowsloop 2.”
Note: If you cannot open the CMD window as admin or see the “Access denied” error, you don’t have admin rights. Follow the second method.
net user "USER_ACCOUNT_NAME" /active:yes

On successful execution, you will see the “Completed successfully” message in the Command Prompt window. You can now close the CMD window, reboot the computer and log into your disabled account. With that, the “Your account has been disabled see administrator” error is fixed.
2. Enable the user account from Administrator account
When there is no second account, we have to enable the built-in administrator account and then use it to enable the disabled user account. Here is how.
First, turn on the system. When you are on the log-in screen, click on the “Power” icon and then click the “Restart” option while holding the “Shift” button. This action will restart the system and take you to the Advanced Startup screen.
In the Advanced Startup screen, select the “Troubleshoot” option.

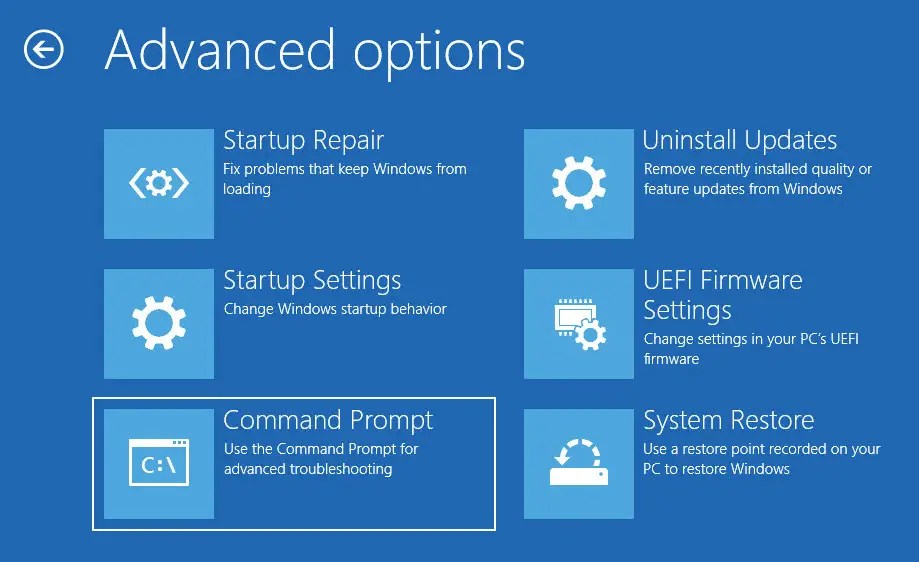
Select “Advanced Options.”


Select the “Command Prompt” option.

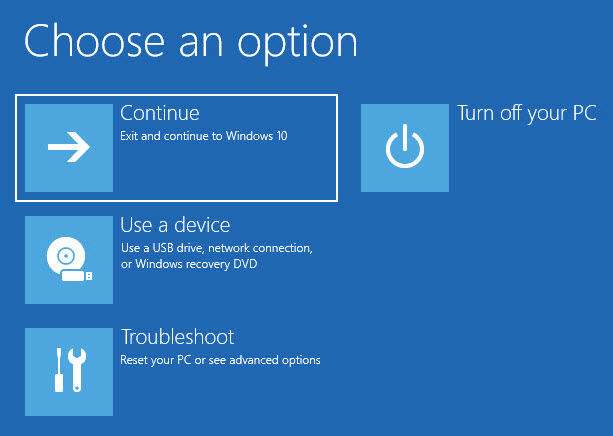
Now, the system will restart again and asks you to choose a user account. Double-click on the user account.


Next, type the password if necessary and click the “Continue” button.


As soon as you do that, Windows will open the Command Prompt window. Here, type the below command and press Enter. It will enable the hidden administrator account.
net user administrator /active:yes


After that, close the Command Prompt window and click the “Continue” option. This action will restart the system normally.
On the lock screen, you should see a new user account called “Administrator.” Select it to log into it. Sometimes, you might have to press the “Sign-in” button after selecting the user account.
After logging into the Administrator account, open the Start menu, search for “Command Prompt,” right-click on the result and select the “Run as administrator” option.
In the CMD window, execute the below command while replacing the dummy account name with the actual user name of the blocked account.
net user "USER_ACCOUNT_NAME" /active:yes
Once the command is successfully executed, restart the computer.
After restarting, you should be able to sign in to your regular user account.
The final step is to disabled the enabled hidden administrator account. To do that, open Command Prompt as an admin from the Start menu and execute the below command. It will disable the system administrator account.
net user administrator /active:no
That is it. With that, you have successfully fixed the “Your Account Has Been Disabled. Please See Your System Administrator” error message in Windows 10 and Windows 11.
I hope that helps.
If you need any help, comment below.