After editing the hosts file, it is important that you save the changes. If you are unable to save hosts file changes. Here’s a simple fix.
Hosts file is present in Windows since forever. You can edit the file to create or map hostnames to their respective IP addresses. The hosts file sits in Windows networking and enforces the rules in the file. One of the best things about the hosts file is that its syntax is very simple and easy to understand. In fact, no matter which operating system you are using, the hosts file’s syntax is fairly similar.
If you ever want to block a website or map a hostname to an IP address, you can use the hosts file to do it. While editing the hosts file is nothing hard, there might be times when you cannot save hosts file after making some changes. This is one of the most common problems for Windows users. The good thing is, it is really easy to fix the issue.
So, without further ado, let me show you how you can save hosts file after making changes in Windows.
Note: The below procedure is also applicable to Windows 7 and 8.
Steps to Fix Unable to Save Hosts Files in Windows
If you’ve ever tried to edit the hosts file, you will know that it is located in the C drive or the Windows installation drive. When you are trying to modify a file within the C drive, you need admin privileges. Without admin privileges, you cannot save any modifications to the hosts file. The problem is Windows makes it a tad bit harder to open hosts files with admin rights. After all, you will not see “Run as administrator” or “Open as administrator” options when you right-click on the hosts file. That being said, it is easier than you think.
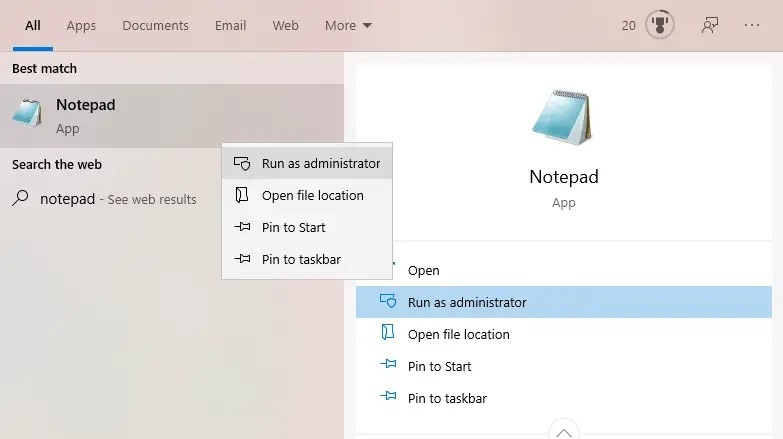
1. First, open the start menu, search for “Notepad”, right-click on it and select “Run as administrator” option. You can also click on the same option appearing in the right panel of the start menu.
2. In the Notepad, click on the “File → Open” option. This action will open a Browse window. Here, go to C:\Windows\System32\drivers\etc folder, select “All files” from the drop-down menu and click on the “Open” button.

3. Now, make the changes you want to make. Once done, select “File → Save” or press Ctrl + S keyboard shortcut to save the modified hosts file.

Unlike before, you can save the hosts file because you are editing the hosts file with administrative rights. That is the reason why we opened the Notepad as an administrator. Whenever you want to edit the hosts file, open the Notepad as administrator and then open the hosts file from the Notepad as shown above. That way, unable to save hosts file issue will be resolved.
Alternative Method
It can be a hassle to open the Notepad as an administrator and then edit the Hosts file. To make things easier, I recommend you use a free portable tool called BlueLife Hosts Editor. The software is pretty simple to use. Just open it, type the hostname and IP address in the top blank fields and click on the “Ok” button. The best thing about the BlueLife Hosts Editor editor is that it makes adding and removing entries easy. All you have do is click a few buttons and you are done.

Being a portable application, you don’t have to install it. Just download the application and run it like you’d any other Windows software. You can download the software from here.
Hope that helps. If you are stuck or need some help, comment below and I will try to help as much as possible.
You just saved a brother!
Thanks a lot.