If Game DVR is using too much CPU, it is easy to fix. Follow the below steps to fix high CPU usage when Game DVR is enabled in Windows 10.
Game DVR or also known as Game Bar is a built-in gaming feature in Windows 10. This specific feature allows you to record your game sessions, connect with your friends, monitor system resources, listen to songs while playing games, and much more. Simply put, Game Bar is a pretty handy feature for many gamers as it gives quick access to some of the most used features.
As good as the Game Bar is feature is, depending on its configuration, it can consume quite a bit of CPU resources. As you can guess, using CPU resources can have a negative impact on gaming performance. This is especially true for simulation games as they are highly dependent on CPU resources.
So, if Game Bar’s CPU is high and causing problems, follow the below steps to reduce Game DVR CPU usage in Windows 10.
Fix High CPU Usage by Game Bar or Game DVR
One of the main reasons for Game DVR’s high CPU usage is the broadcast service. When the broadcast service is enabled and running, it records the game in the background and allows you to broadcast it to streaming services, if needed. As you can guess, recording a game uses a lot of CPU resources. Especially if the recording quality is high. So, if you are not using the broadcast feature, disabling it in Game Bar will reduce the CPU usage.
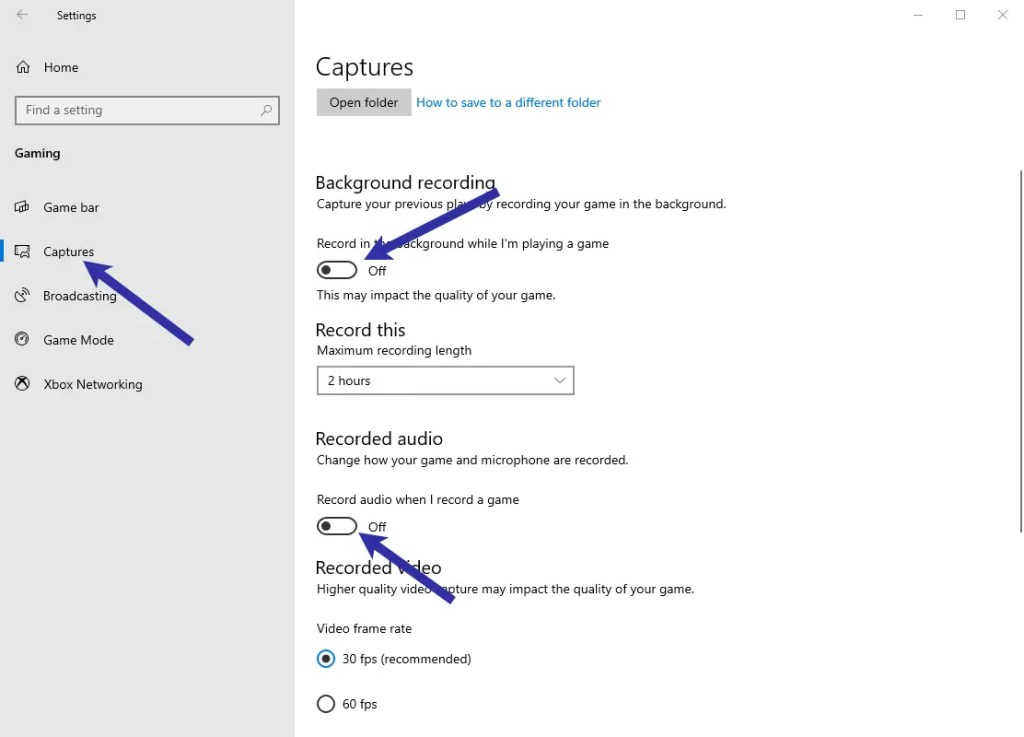
1. First, open the PC Settings application with the Win + I keyboard shortcut. After opening it, go to the “Gaming → Captures” page.
2. Once you are here, on the right page, toggle the switch under “Record in the background while I’m playing a game” to “Off” position.
3. Next, toggle the switch under “Record audio when I record a game” to “Off” position. You can see this option under the Recorded Audio section.
4. After that, go to the “Broadcasting” page on the left panel. Now, toggle the switches under “Record audio when I broadcast” and “Use camera when I broadcast” to “Off” positions.

5. That is it. The changes are instantly applied. If you want to make sure, you can reboot Windows 10 after making the changes.
Wrapping Up
From now on, Game Bar will not record your gameplay thus reducing the overall background CPU usage. In the future, if you want to record and broadcast your gameplay, just reverse all the steps we just did and you will be done.
A quick tip: To keep the CPU usage low even after enabling the record and broadcast feature, you can reduce the recorded video quality from the “Broadcasting” page.

If you like this article do check out how to fully and completely disable Game DVR or Game Bar in Windows 10 and how to use Game Bar to record your screen in Windows 10.
I hope that helps. If you are stuck or need some help, comment below and I will try to help as much as possible.