This guide shows you how to disable Windows Defender, also known as Windows Security in Windows 10 & 11, in simple and easy steps.
Windows Defender, also known as Windows Security, is the default antivirus in Windows 10 and 11. In case you don’t know, Microsoft changed the name from Windows Defender to Windows Security. Over the years, Windows Security has improved dramatically and is on par with third-party antivirus software. Additionally, Windows Defender works silently in the background while using fewer system resources and has advanced features like tamper protection and a built-in Windows Defender sandbox to protect itself.
However, there will be moments when Windows Defender will be overly aggressive. This aggressive action will result in false positives and may possibly result in the blocking of files and programs. In such cases, you can disable Windows Defender. Let me demonstrate.
Note: Windows Defender disables itself if you install third-party antivirus software. If you are disabling Windows Security just to install third-party antivirus software like AVG, Avast, Bitdefender, etc.., there is no need for that.
Security Warning: You should always use antivirus software to protect your computer from viruses and malware. So, only disable Windows Defender temporarily or use good third-party antivirus software.
The steps below work the same in Windows 10 and 11.
Table of contents:
Disable Windows Defender Temporarily
If Windows Defender is blocking some program or file and you know it is a false positive, you can temporarily stop Windows Defender. It will automatically resume its work in the background when you turn it on or after restarting the system.
- Press the Start key.
- Search and open “Windows Security.”
- Click “Virus & Threat Protection.”
- Press the “Manage Settings” link.
- Turn off the following options.
- Real-time protection
- Cloud-delivered protection
- Automatic sample submission
- Tamper protection
- Click “Yes” if you see a UAC prompt.
- Close the Windows Security panel.
- With that, Windows Defender is disabled.
Steps with more details:
Temporarily disabling Windows Defender is pretty simple. First, open the start menu, search for “Windows Security,” and open it.

Once the Windows Security app has been opened, click the “Virus & Threat Protection” option.

Now, click the “Manage Settings” link appearing under the “Virus & Threat Protection Settings” section.

Toggle the switches under the following sections to the Off position on the right panel.
- Real-time protection
- Cloud-delivered protection
- Automatic sample submission
- Tamper protection

Once you do that, Windows Defender is disabled. You can now work with the files or programs without worrying about Windows Security blocking them.
You can enable Windows Defender back when you are done by toggling the switches to the On position. If you don’t manually enable Windows Defender, it will enable itself after rebooting the system.

How to Disable Windows Defender via Group Policy Editor
If Windows Defender is causing problems and you want to disable Windows Defender permanently, you can do that using the Group Policy settings. All you have to do is enable a single policy, and you are done. If you want to, you can back up group policy settings before changing them.
- Press the “Win + R” keyboard shortcut.
- Type “gpedit.msc.”
- Press the “Ok” button.
- Go to the following folder. Computer Configuration > Administrative Templates > Windows Components > Microsoft Defender Antivirus
- Double-click the “Turn off Microsoft Defender antivirus” policy.
- Select the “Enabled” radio option.
- Click the “Ok” button.
- Close the Group Policy Editor.
- Reboot Windows.
- With that, Windows Defender is disabled.
Steps with more details:
To access the “Group Policy Editor,” hit Win + R, type gpedit.msc, and then click the “Ok” button. You can also look for it in the start menu.

On the left panel of the Group Policy Editor, you will see several folders. Navigate to the following folder.
Computer Configuration > Administrative Templates > Windows Components > Microsoft Defender Antivirus
Once in the “Microsoft Defender Antivirus” folder, locate and double-click the “Turn off Microsoft Defender Antivirus” policy on the right panel.

The above action will open the policy properties window. Select the “Enabled” option and click the “Ok” buttons to save changes.

Reboot the computer.
After rebooting, the Windows Defender is turned off completely. After disabling Windows Security, you might still see the shield icon in the taskbar. You can remove it from the Taskbar settings.
Select “Not Configured” in the policy settings window to enable Windows Defender again and restart the system.
How to Turn Off Windows Defender from Registry
Home edition users won’t have access to the Group Policy Editor. In that case, you can modify registry keys to disable Windows Defender. Let me show you how. Before proceeding, back up the registry.
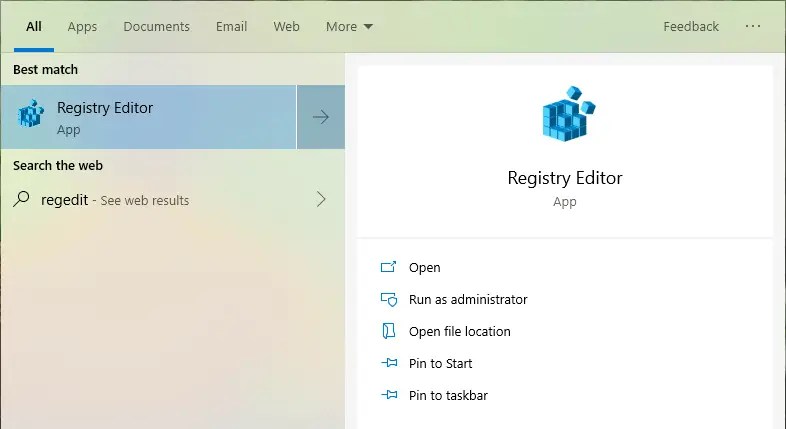
- Press the “Start” key.
- Search and open “Registry Editor.”
- Go to the following folder. HKEY_LOCAL_MACHINE\SOFTWARE\Policies\Microsoft\Windows Defender
- Right-click the “Windows Defender” folder.
- Select “New -> DWORD (32-bit) Value.”
- Type “DisableAntiSpyware” as the name.
- Double-click the new value.
- Type “1” in the “Value Data” field.
- Press the “Ok” button.
- Close the Registry Editor.
- Reboot Windows.
- With that, Windows Security is disabled.
Steps with more details:
Open the Registry Editor. You can search for it in the Start menu or use the “regedit” Run command.
In the Registry Editor, paste the below path in the address bar and press “Enter.” It will take you to the folder we need.
HKEY_LOCAL_MACHINE\SOFTWARE\Policies\Microsoft\Windows Defender

On the right panel, right-click the “Windows Defender” folder and select the “New -> DWORD (32-bit) Value” option. Name the new value “DisableAntiSpyware.”

After creating the value, double-click it and change the value data from “0” to “1.” click the “Ok” button.

Reboot the system, and Windows Defender will be disabled.
If you ever want to, you can revert the change by deleting the newly created value or changing the value data back to 0.
—
That is it. It is that simple to disable Windows Security in Windows 10 and 11.
I hope this simple and easy Windows how-to guide helped you.
If you are stuck or need some help, send an email, and I will try to help as much as possible.